Key Details of Plex Media Server
Plex Media Server is a powerful media streaming solution that allows people to stream their media and organize it into an easy-to-use media center. It can be used across multiple devices and platforms, including mobile devices, smart TVs, game consoles, and more. With Plex Media Server, one can easily access their entire library of movies, music, photos, and other content from any device in the home. It also includes built-in features such as parental controls and recommendations for new content to watch. Plus, with its integrated cloud storage capabilities, users can easily stream their media to friends or family members who are not at home. Furthermore, Plex Media Server offers a comprehensive platform to manage all your media collections with ease. Whether you’re looking for an on-the-go solution or an all-in-one home entertainment system, Plex Media Server has everything you need for a hassle-free streaming experience.
build your own Plex media center.
Building your own Plex media center is a great way to stream your favorite movies, shows and music. To get started, you’ll need a Plex server. This will provide the core of your media center and allow you to store, manage and stream all of your digital content. Once you have your server setup, you can begin adding additional components such as a TV or monitor, speakers, remote control, etc. You may even want to create a dedicated home theater space for the ultimate streaming experience! With all these components in place, you’ll be ready to access your content from any device or platform connected to the Internet. The flexibility and convenience of creating a custom Plex media center makes it an ideal choice for anyone looking to take their streaming experience to the next level.
How to enable remote access and library sharing
Enabling remote access and library sharing with Plex Media Server is an easy process. First, you need to download and install the Plex server on your computer. Once you have done that, you can use the Plex client to stream your personal media library to any device connected to the internet. This includes live TV and recorded shows, as well as all of your personal videos, music and photos. To access your library remotely, you will need a free Plex account. You can take it one step further by subscribing to a Plex Pass subscription, which will give you access to extra features such as synchronization across devices and parental control settings. With a few simple steps, you will be able to share your media library with friends and family around the world so that everyone can enjoy your collection!
Access and search all your streaming services with Plex Discover
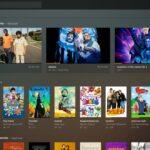
Plex Discover is a powerful solution to access and search all your streaming services with ease. With Plex Discover, you can search through thousands of movies and TV shows with a single universal search. You can create personalized watchlists for both theatrical releases and personal media libraries. The Plex Server feature ensures that you can stream the latest episodes and movies straight from your device in no time. With Plex Discover, you can easily find the perfect content for any occasion or mood from Netflix, Hulu, Disney+, Amazon Prime Video, HBO Max, Youtube TV, Apple TV+ and more. Plus, its easy-to-use interface makes it simple to stay up-to-date on your favorite content by creating reminders for upcoming releases and discovering similar titles across all streaming services. With Plex Discover, you’ll never miss a moment of entertainment!
Managing Your Plex Server
Managing your Plex Server can be daunting, but with the right guidance, it doesn’t have to be. The expert’s guide to managing your Plex Server will help you get the most out of your media streaming experience. Start by considering where and how you’ll store your media library on a hard drive. This is important as it will determine the speed and reliability of your server. Next, set up an account on the Plex website to access all of its features, including remote control from any networked device. Choose a secure password for maximum protection of your data. Finally, configure server settings such as bandwidth usage and transcoding options to ensure that everything runs smoothly. With these steps in place, you’ll be ready to enjoy all the benefits of having a Plex Server in no time!
Best Plex server options
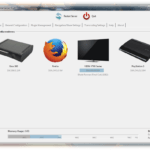
The best Plex server options depend on what you want to use Plex for. If you want to stream your media libraries, the Nvidia Shield TV Pro and the Nvidia Shield TV are both excellent options. They come with the Plex app preinstalled, so you can simply download Plex and begin using it right away. If you’re looking for a more traditional NAS setup, FreeNAS is a great option. It runs on FreeBSD and can host multiple hard drives simultaneously, enabling you to store even large media libraries with ease. Of course, if you don’t want to invest in any new hardware but already have an old computer lying around, then setting up a Plex Media Server on it could be just what you need. All of these options make it easy for anyone to use Plex and enjoy streaming their multimedia content from anywhere.
How to set up a Plex server
Setting up a Plex server is not complicated and can be done quite easily. First, you need to create a folder that will contain all of your media files. Next, you’ll need to install the Plex Media Server software on your device (Nvidia Shield, NAS, etc.) and create a Plex account. Once this is done, you can begin adding your media files to the Plex Library within the server. Finally, if you’d like other devices to access your Plex library, you’ll need to install the Plex Client app on them and sign in with your Plex account credentials in order to gain access. That’s really all there is to it; once everything is set up correctly, you can start streaming all of your media files right away!